PSP 2K Disassembly Guide
This page will walk you through all you need to know on how to disassemble your PSP 2000 so it is ready for the PS Placeable build. There is a chance the inside of your PSP will be slightly different. Most 2000 models looks the same and all have the same screw placements.
PLEASE IF YOU WANT CUSTOM FIRMWARE ON YOUR PSP INSTALL THAT BEFORE FOLLOWING THIS GUIDE.
Back external screws
There are 4 external screws on the back side of the PSP. There are two exposed and the other two are under the battery cover. One is hidden under the warranty sticker in the battery compartment. (Keep all your screws we will be reusing them.)

Top external screws
There are 2 screws on the top of the PSP shell. Remove both of these.

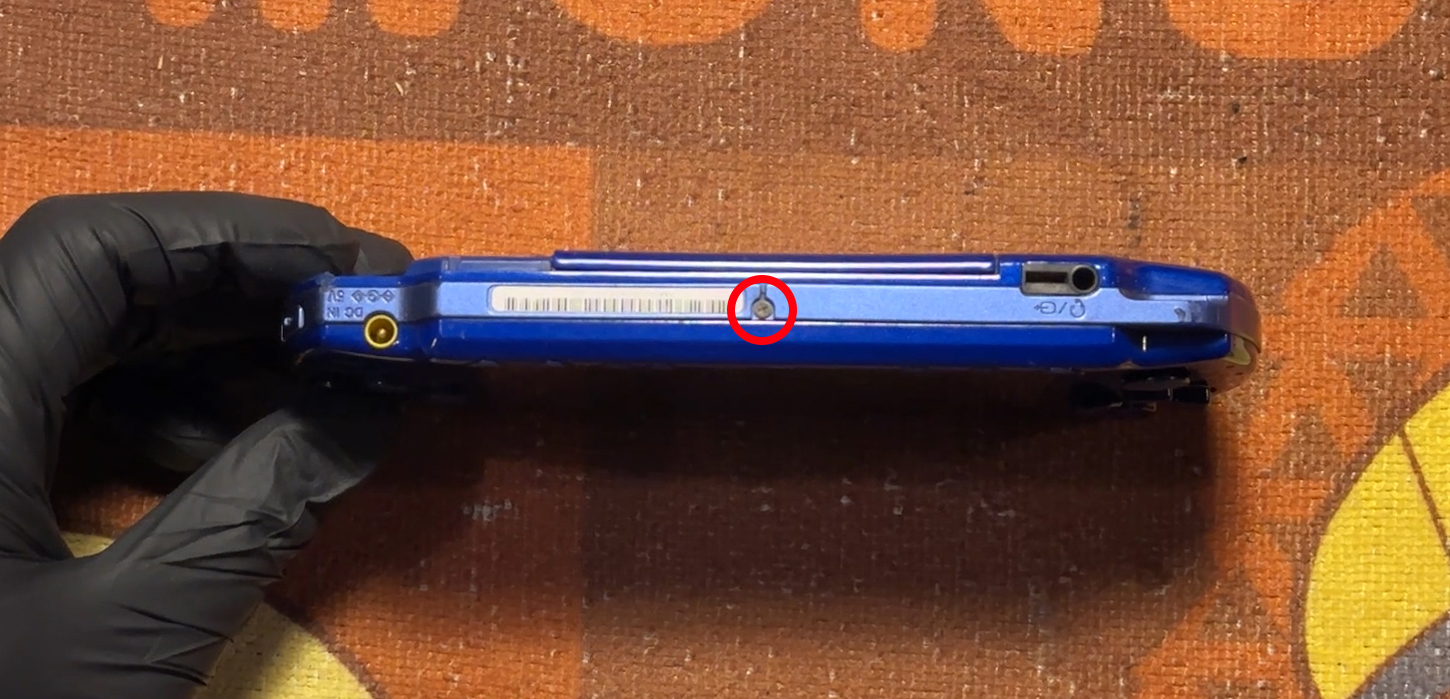
Bottom external screws
The last external screw is found on the bottom of the PSP shell.
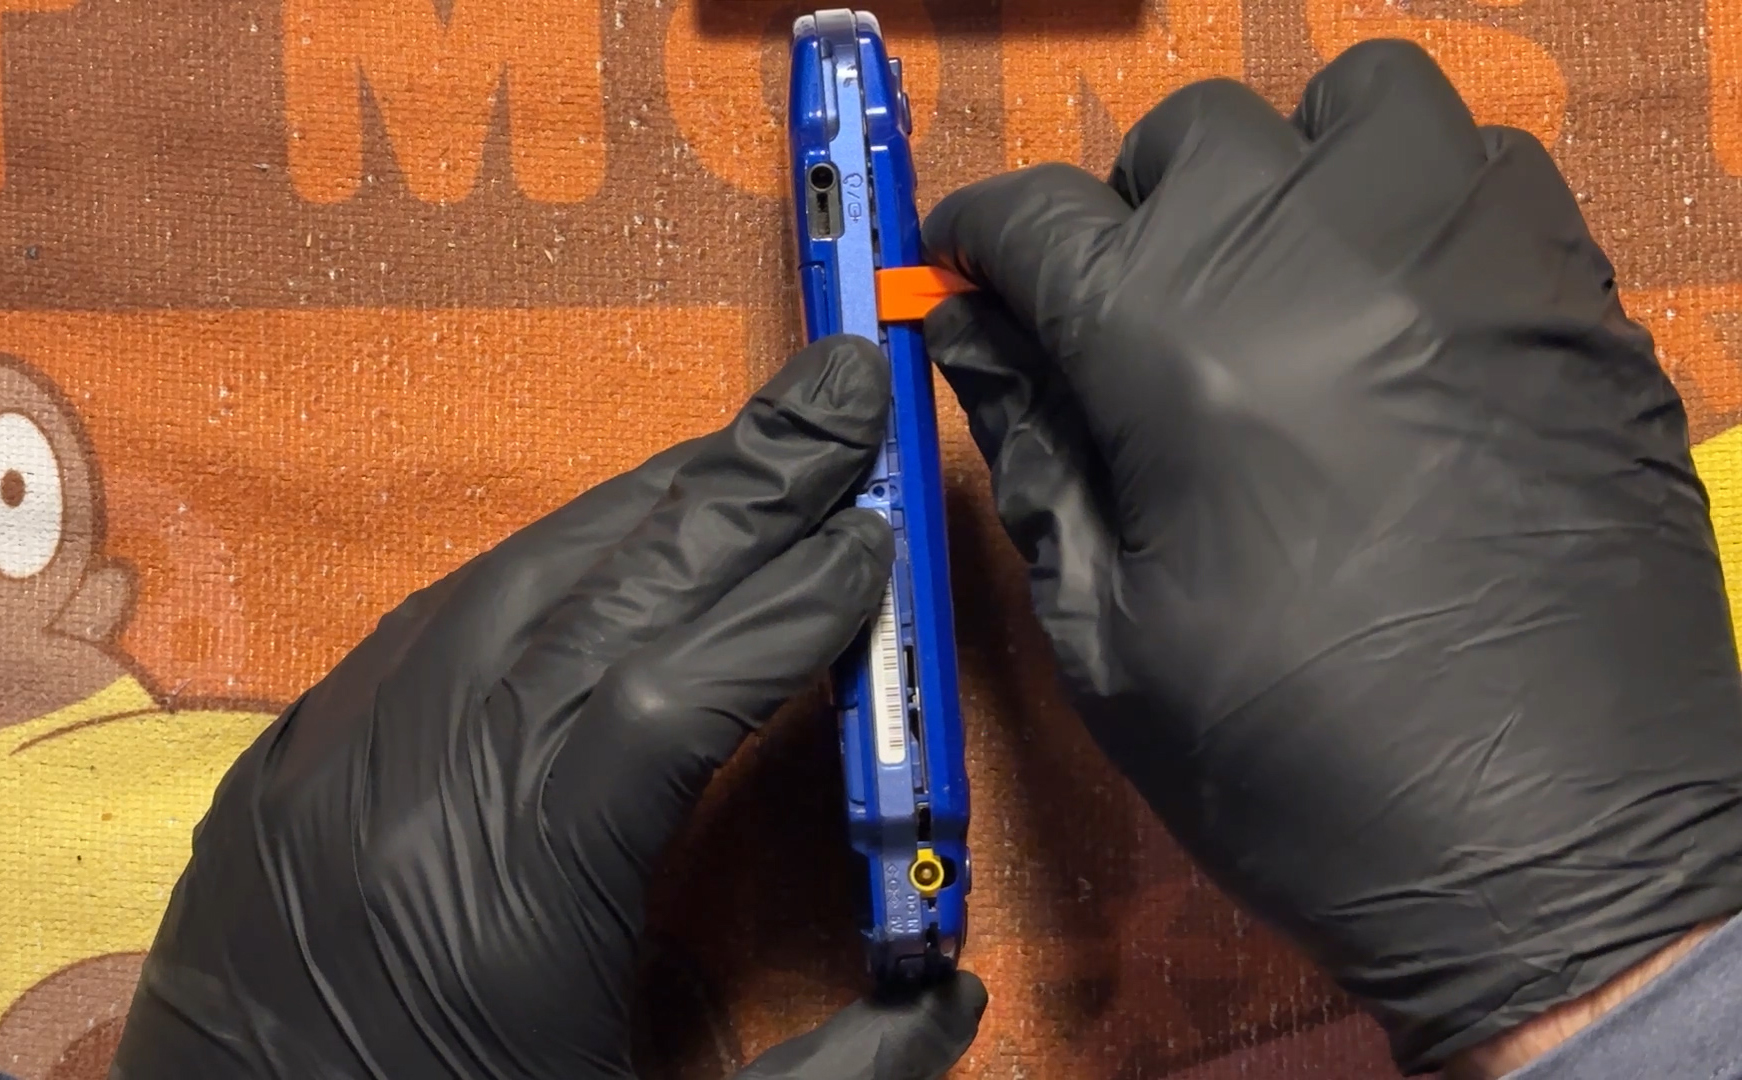
Pry the front of the shell off the PSP
Follow the seam all the way around the PSP to remove the front of the shell. We will not need the front shell or screen so its ok if clasps are broken during removal.
Unhook small clasp
There is a small tab to pry up on the left side of the select/start strip at the bottom of the screen. Then there are three small metal pins keeping the screen in place. Make sure your menu bar looks like the picture in the next step before lifting the screen from these three pins.
Unhook small clasp
The menu bar flips down once it has been freed from both sides. This makes removing the screen much easier. Once the screen is removed from the pins it should fold down so you can access the ribbon cables.
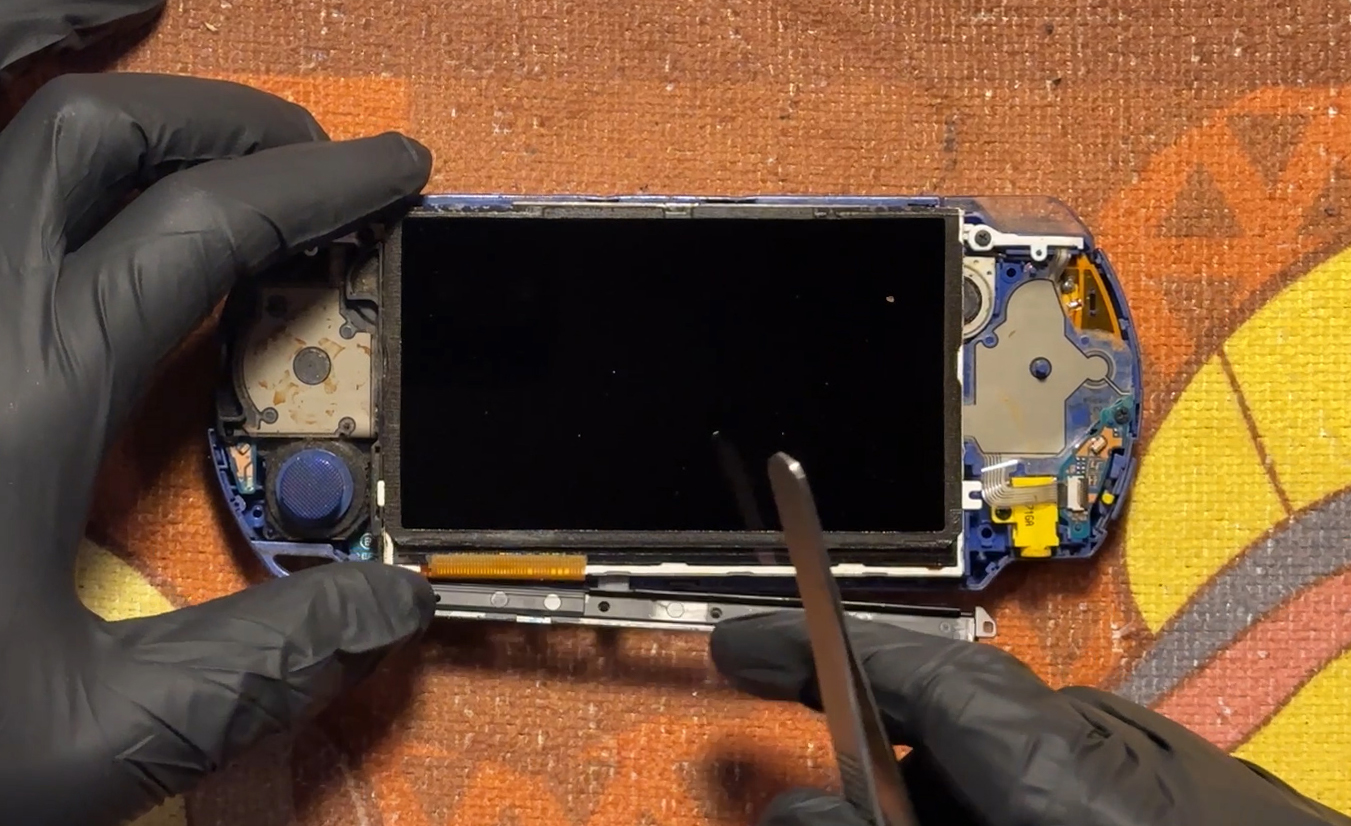
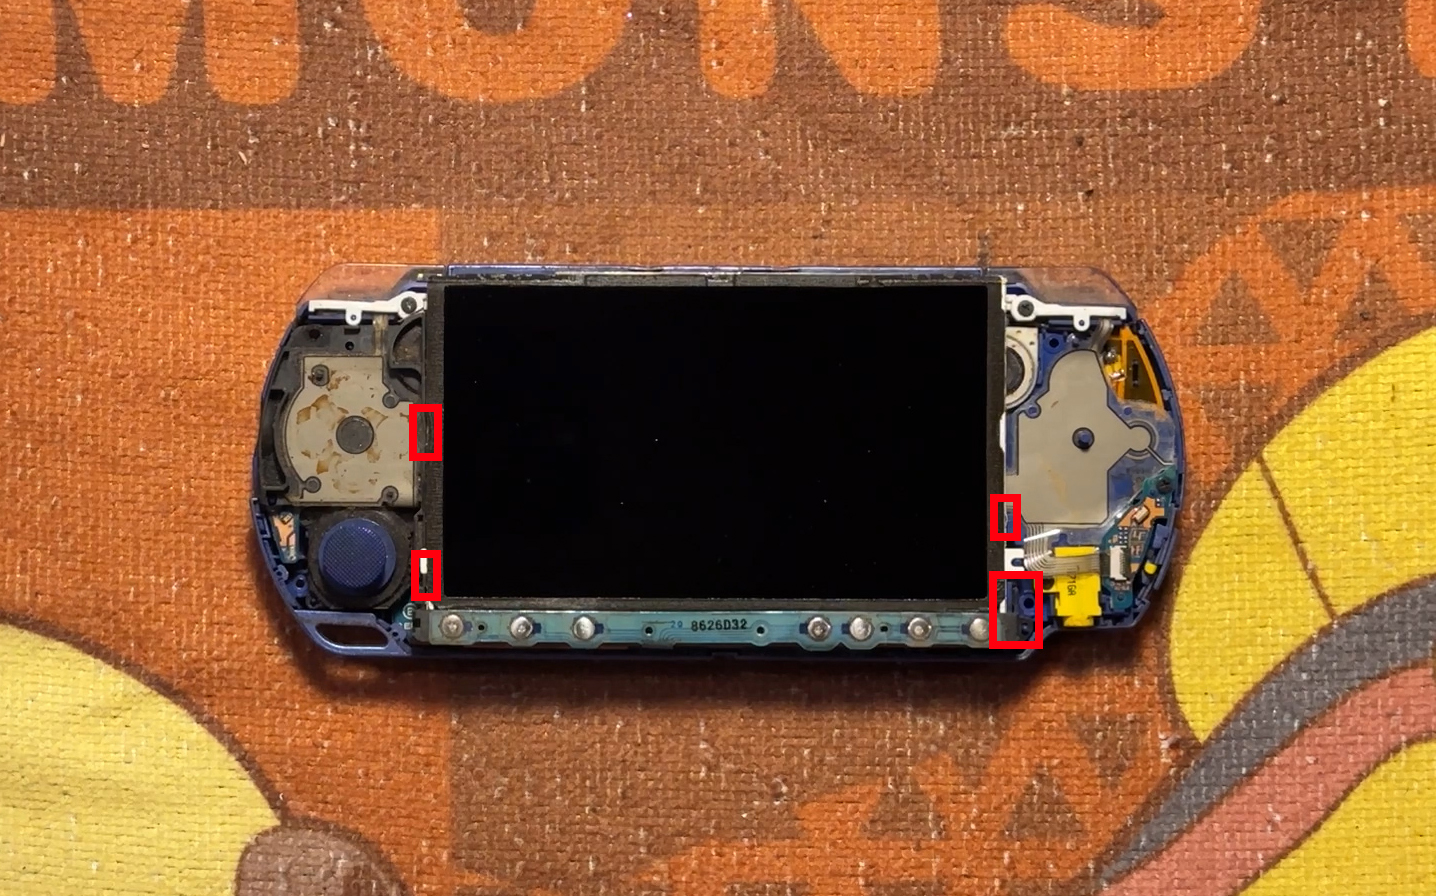
Disconnect the PSP screen
There are three connectors to unhook for the screen and menu buttons. Whoa this PSP is dirty :O! A good reason to open them and at least clean them out.
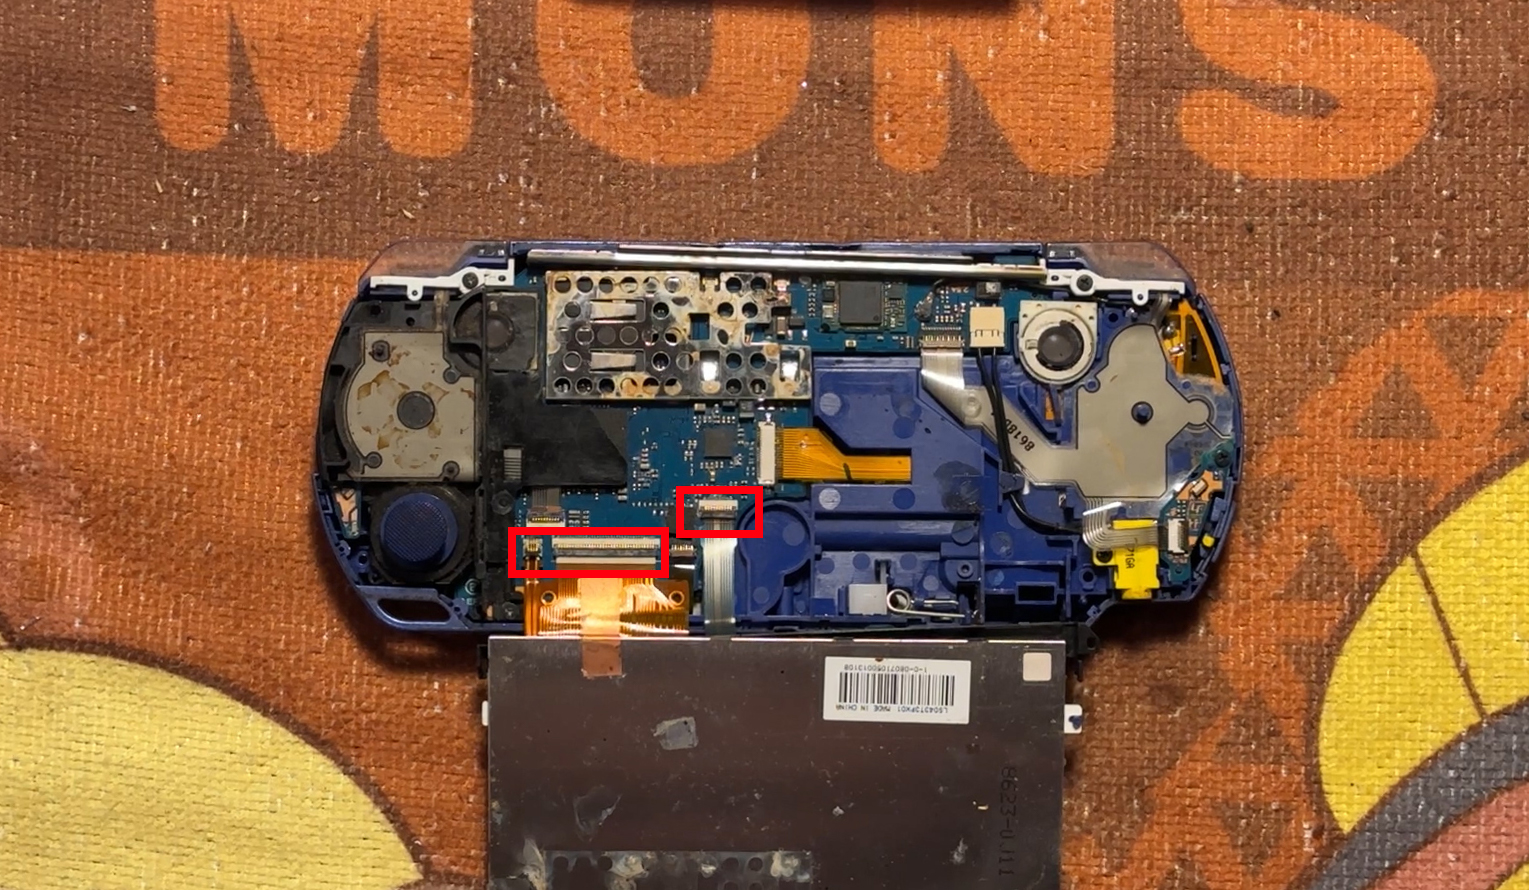
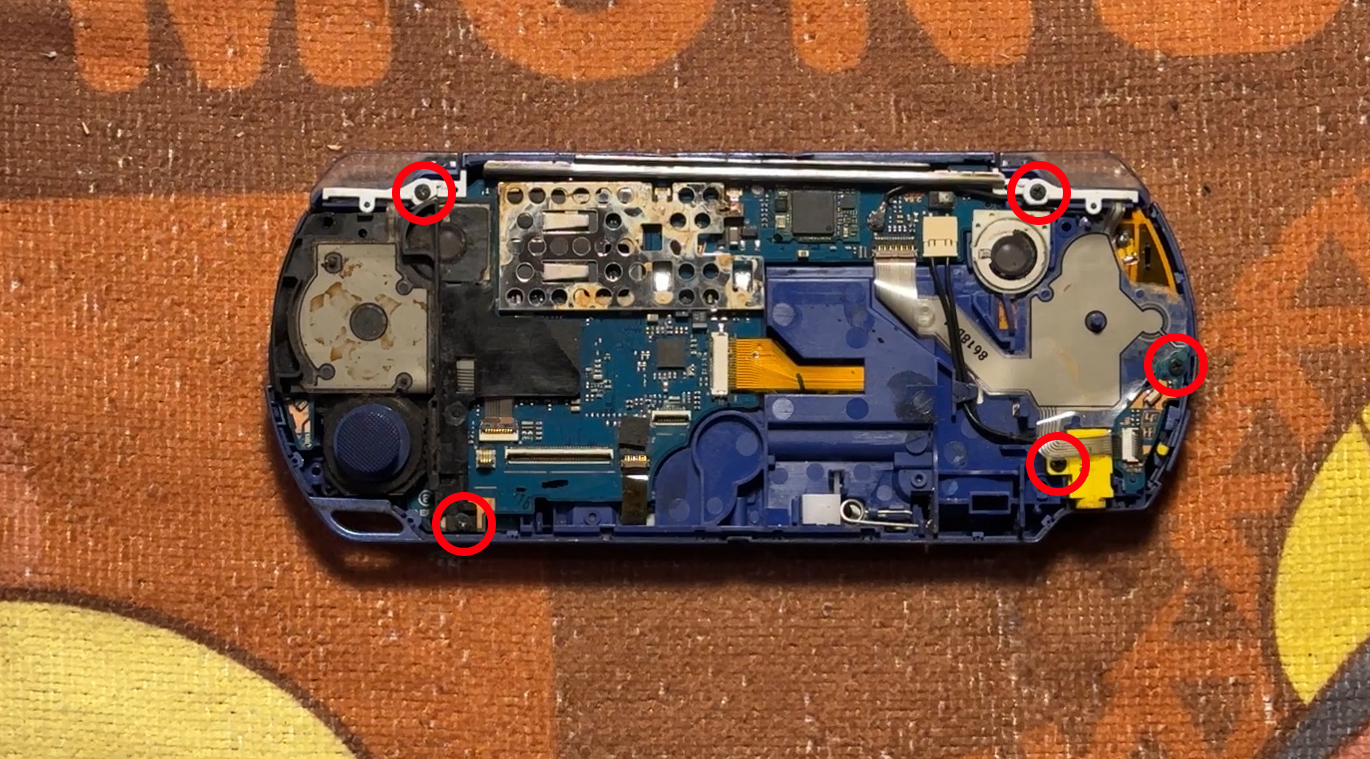
Removing internal screws
There are 5 internal screws holding down a few different parts. You can remove them all at once. Remember to save these we need them as well.
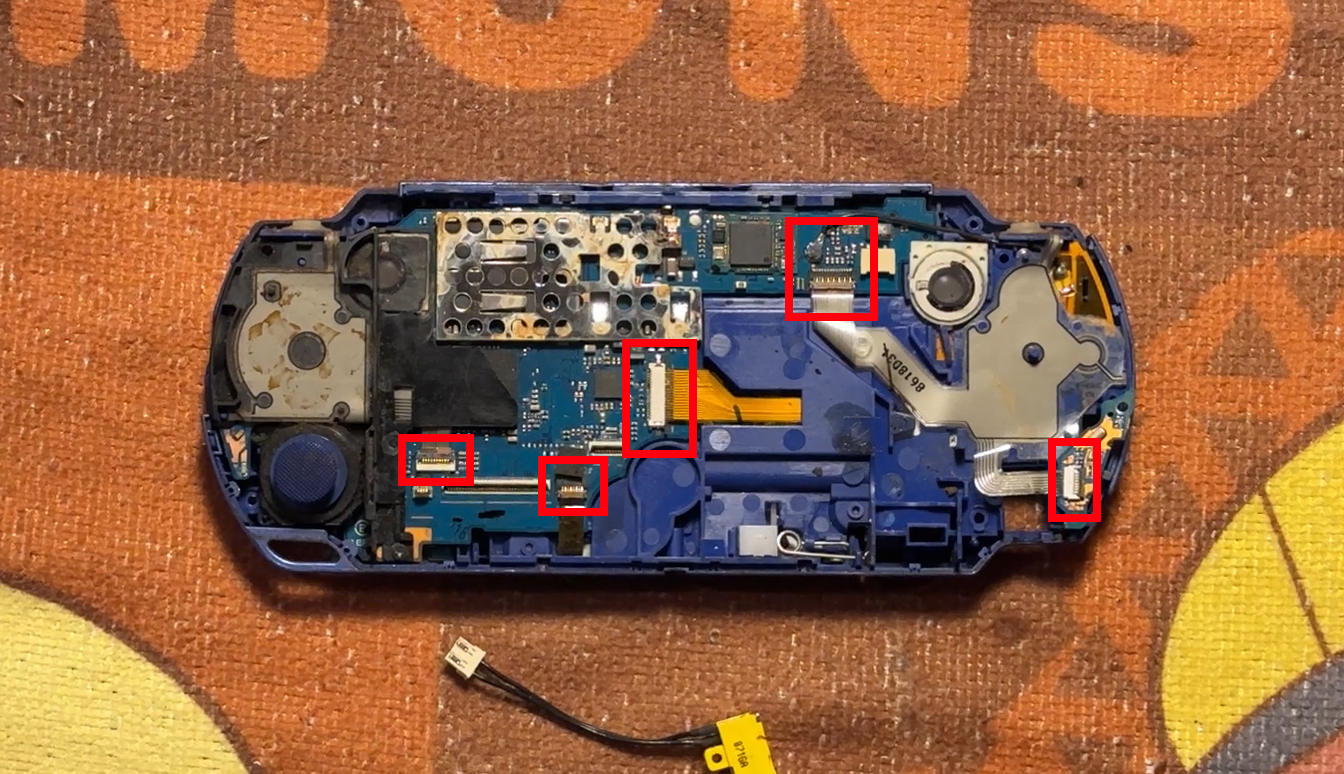
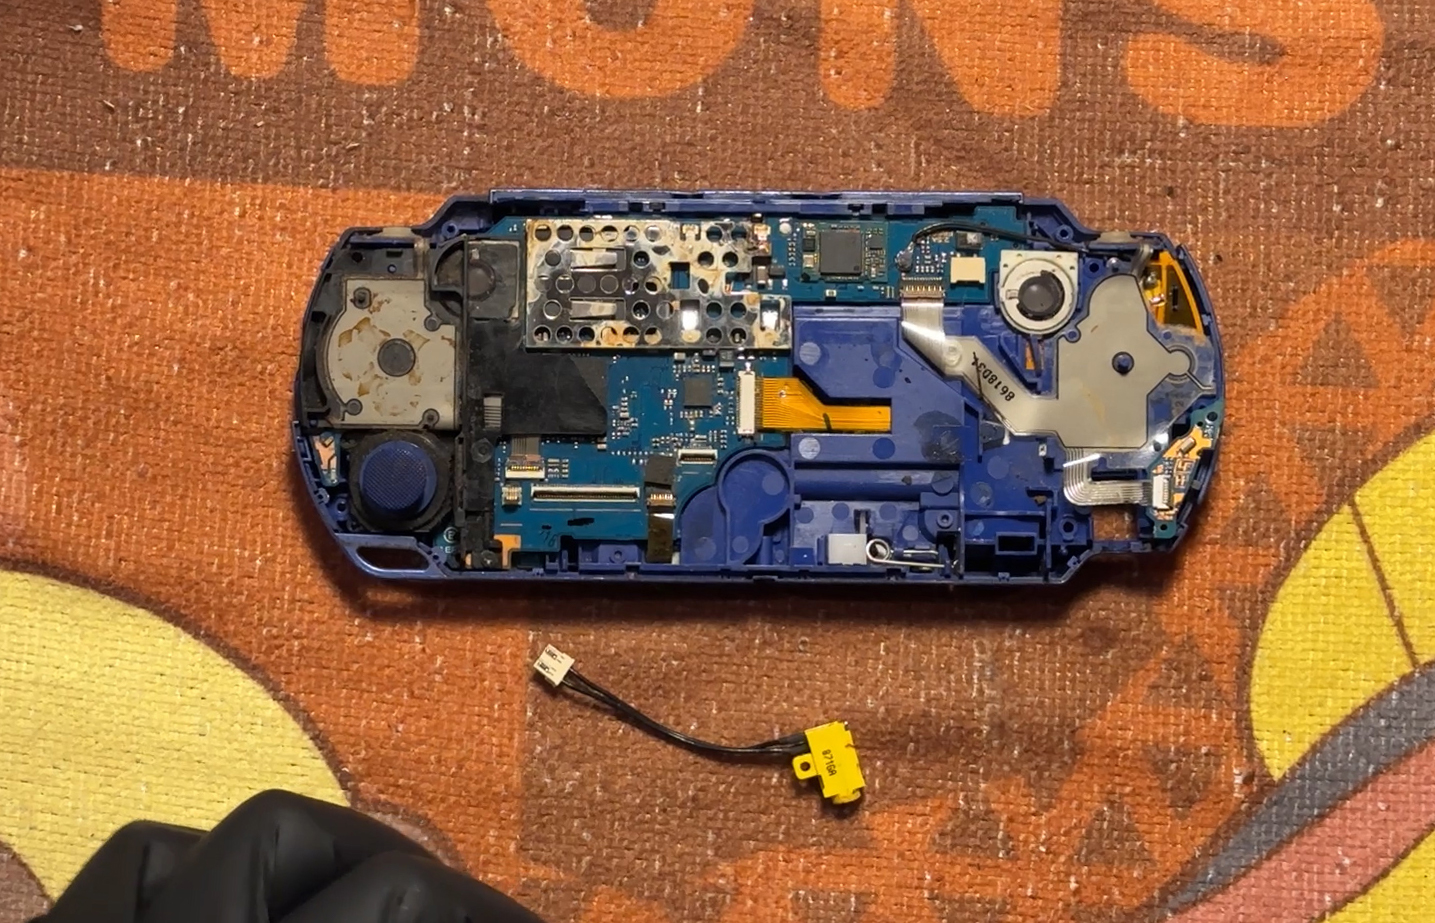
Removing internal components
Remove the top trigger buttons and disconnect the remaining highlighted connectors. The board will be removed completely briefly so feel free to disconnect all cables.
Set aside power cable
The power cord has a small tab to push aside letting you lift it out. Then pull straight down to remove it from the connector. Set this aside we will need it for later.
Remove left and right pads
-
Make sure you pull out the SD card if inserted and the cover should be in the pulled out position to remove the left plastic piece. (This PSP's cover broke so I do not have that part to pull into the out position. )
-
The right button pad can be pulled up; it is taped to the board so use a bit of force to pull up on it.
Lift the PCB
The PCB is clicked into the video out board. Pry up gently on the board and it should lift free letting you then pull down on it removing it from the shell completely.
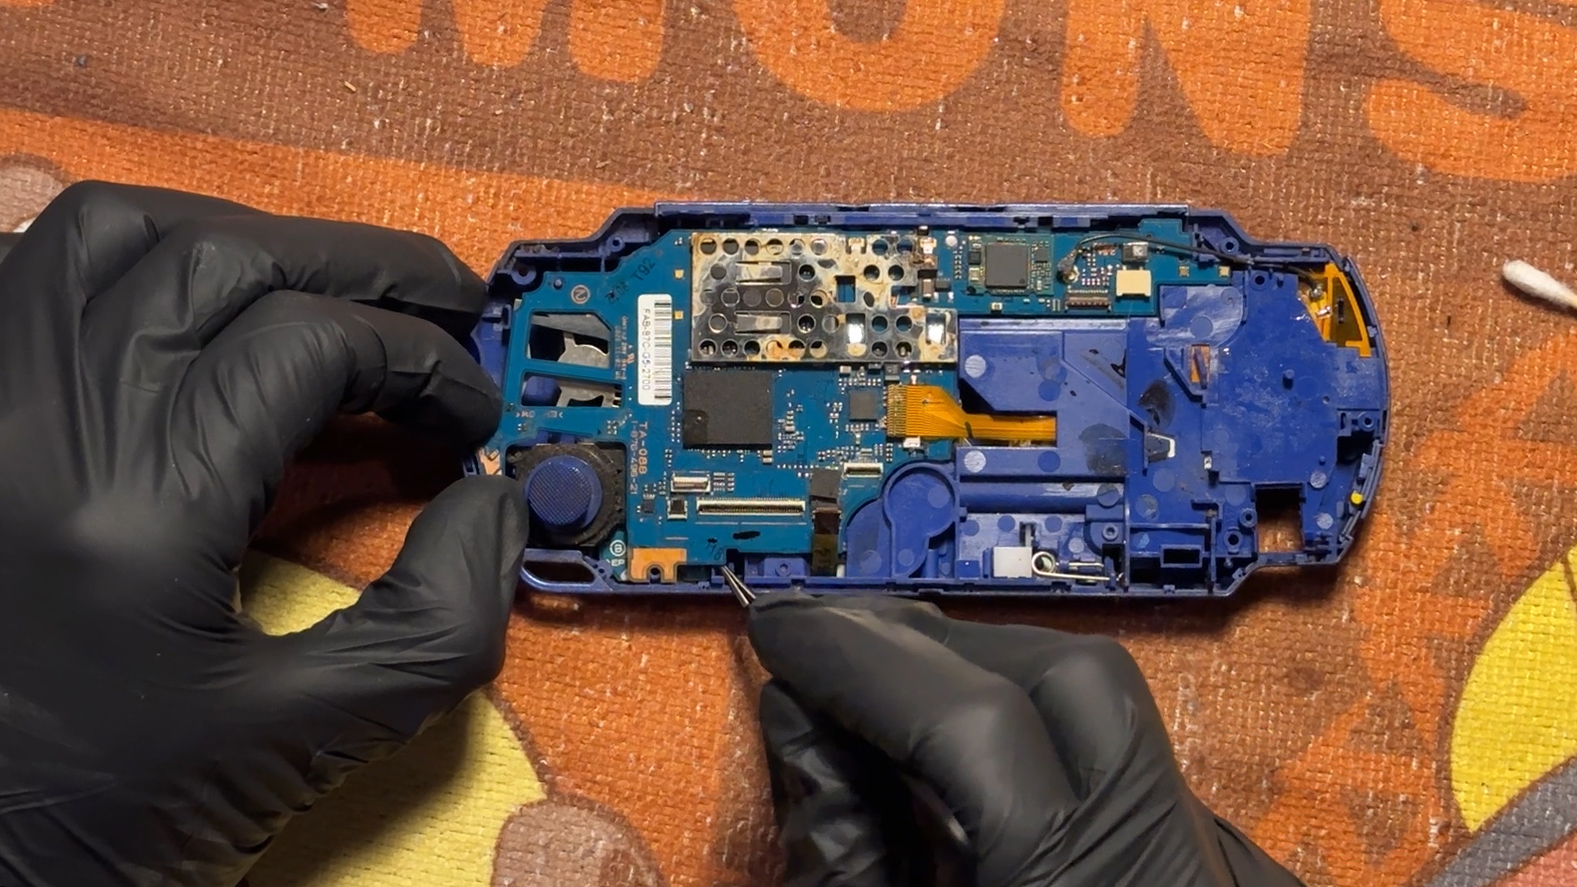
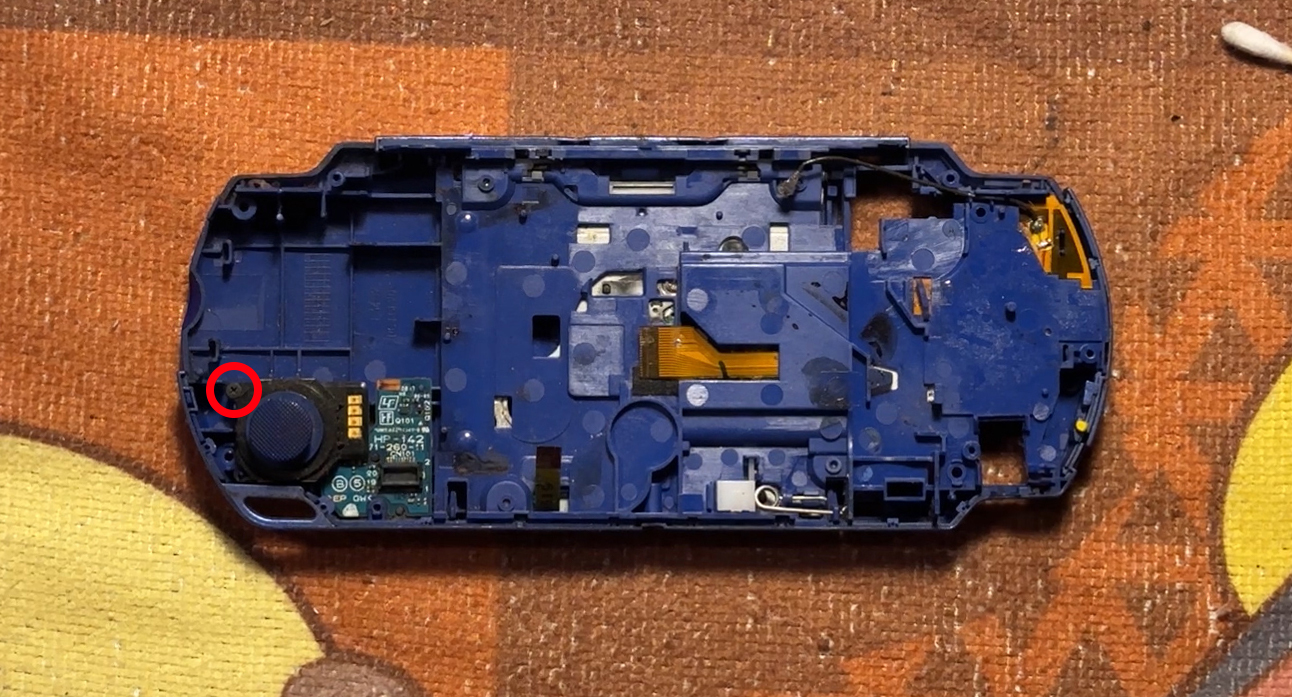
Remove screw from analog stick
With the board out you can see the screw holding the analog stick in place better. Remove this screw and set the thumb stick and screw aside. We will need both of them soon.
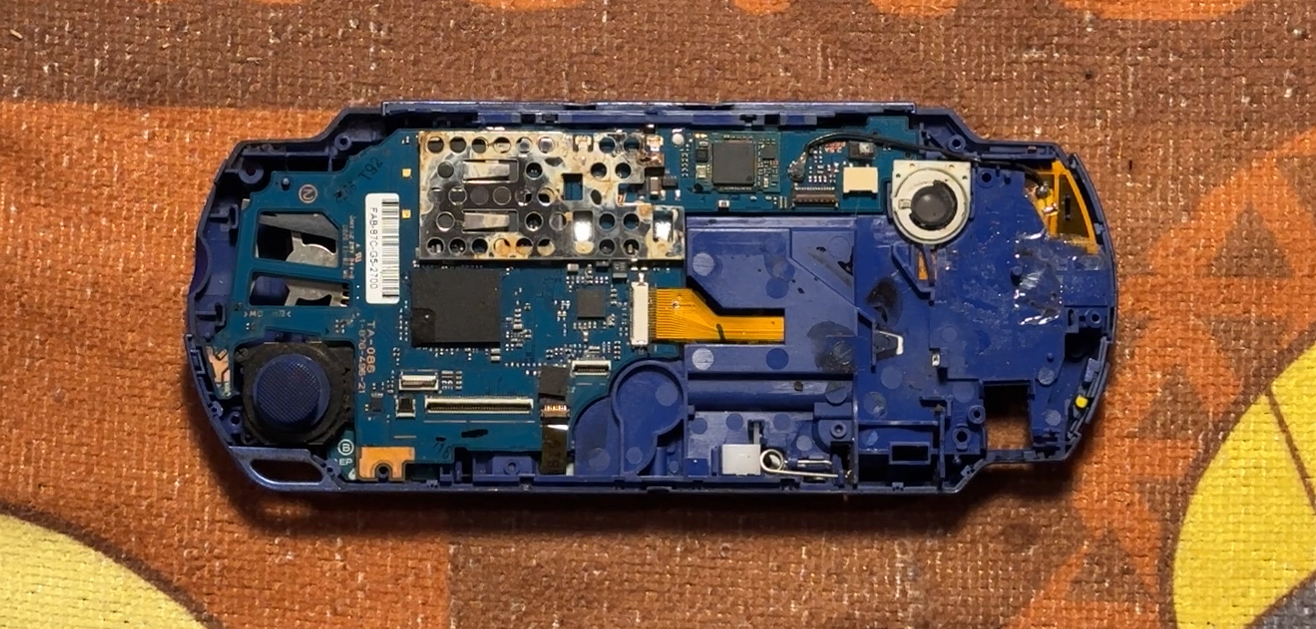
This is what your board will look like when done
The PSP 2000 requires a custom ribbon cable included in the purchased kits. That is all explained in the build guide. I want to show though that you should have the small white part in the top right corner that used to hold the R bumper in place. That part holds the mother board down as well we will need that.
Click the button below to jump to the 2K build guide